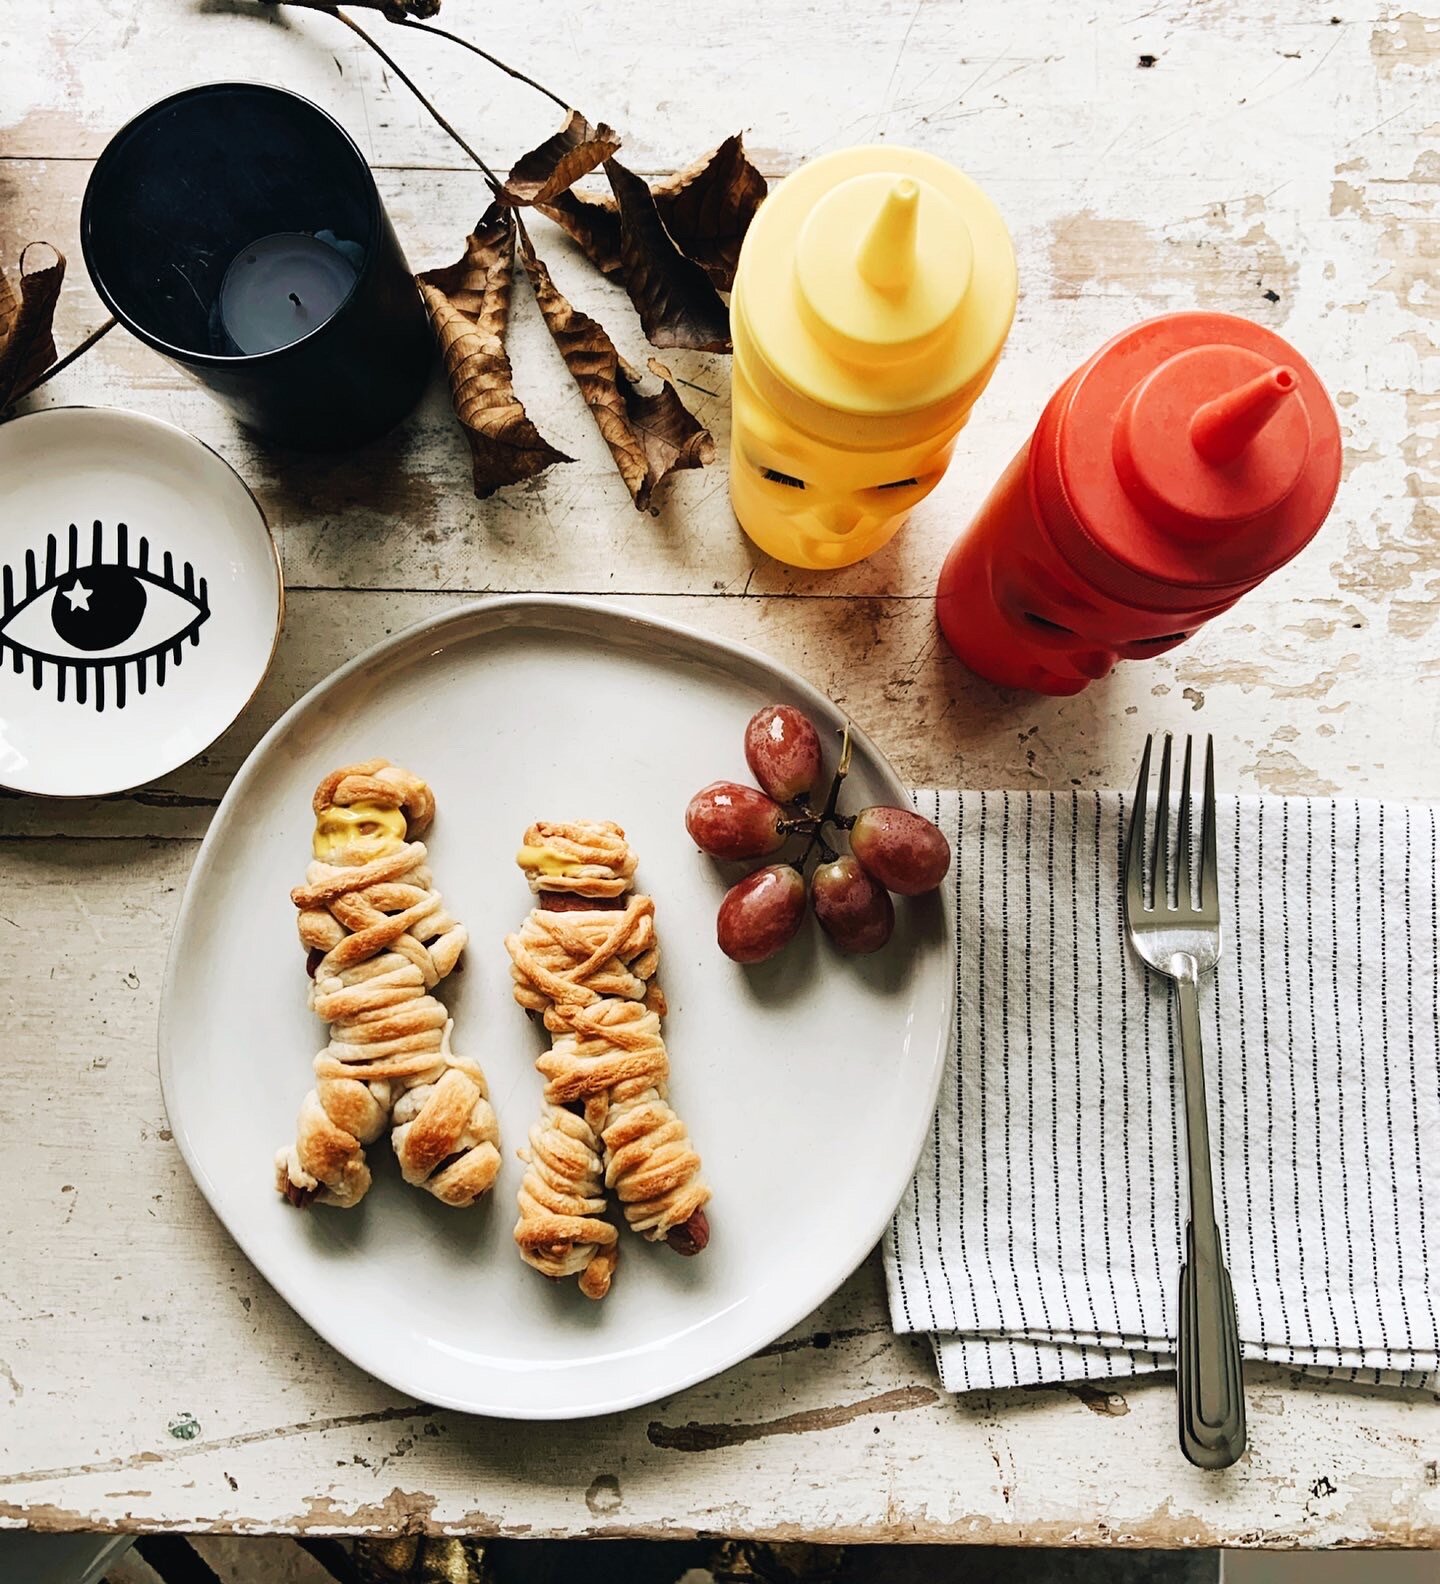
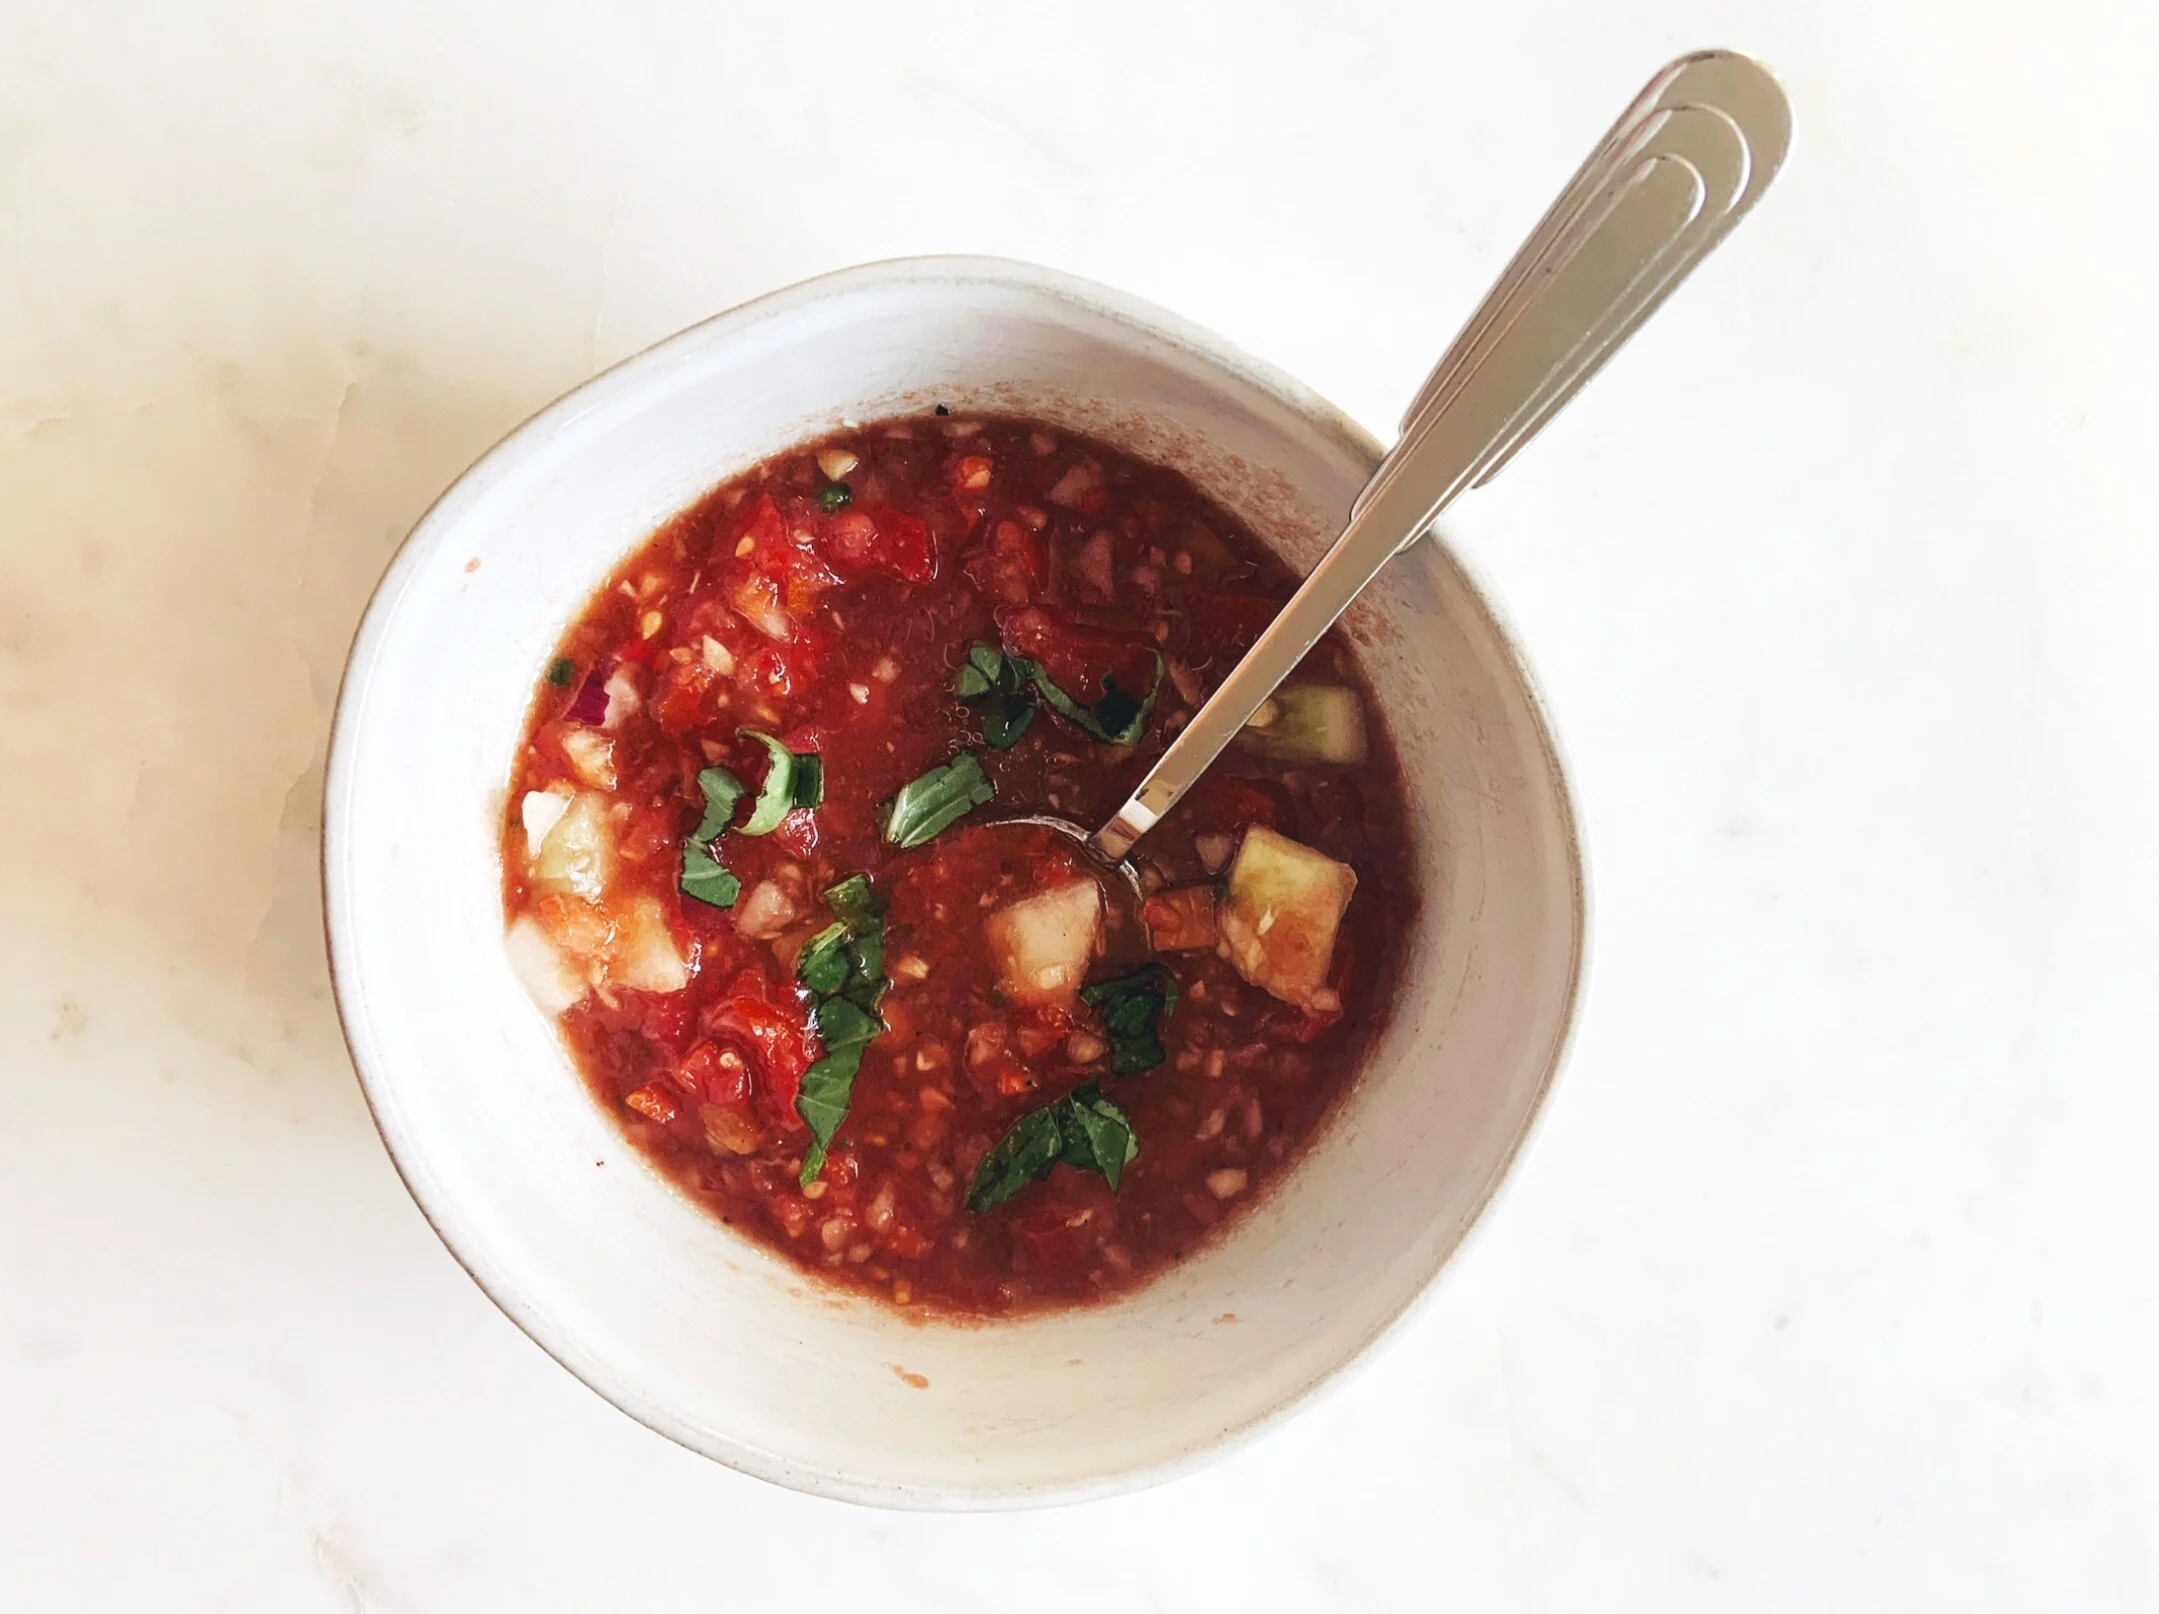
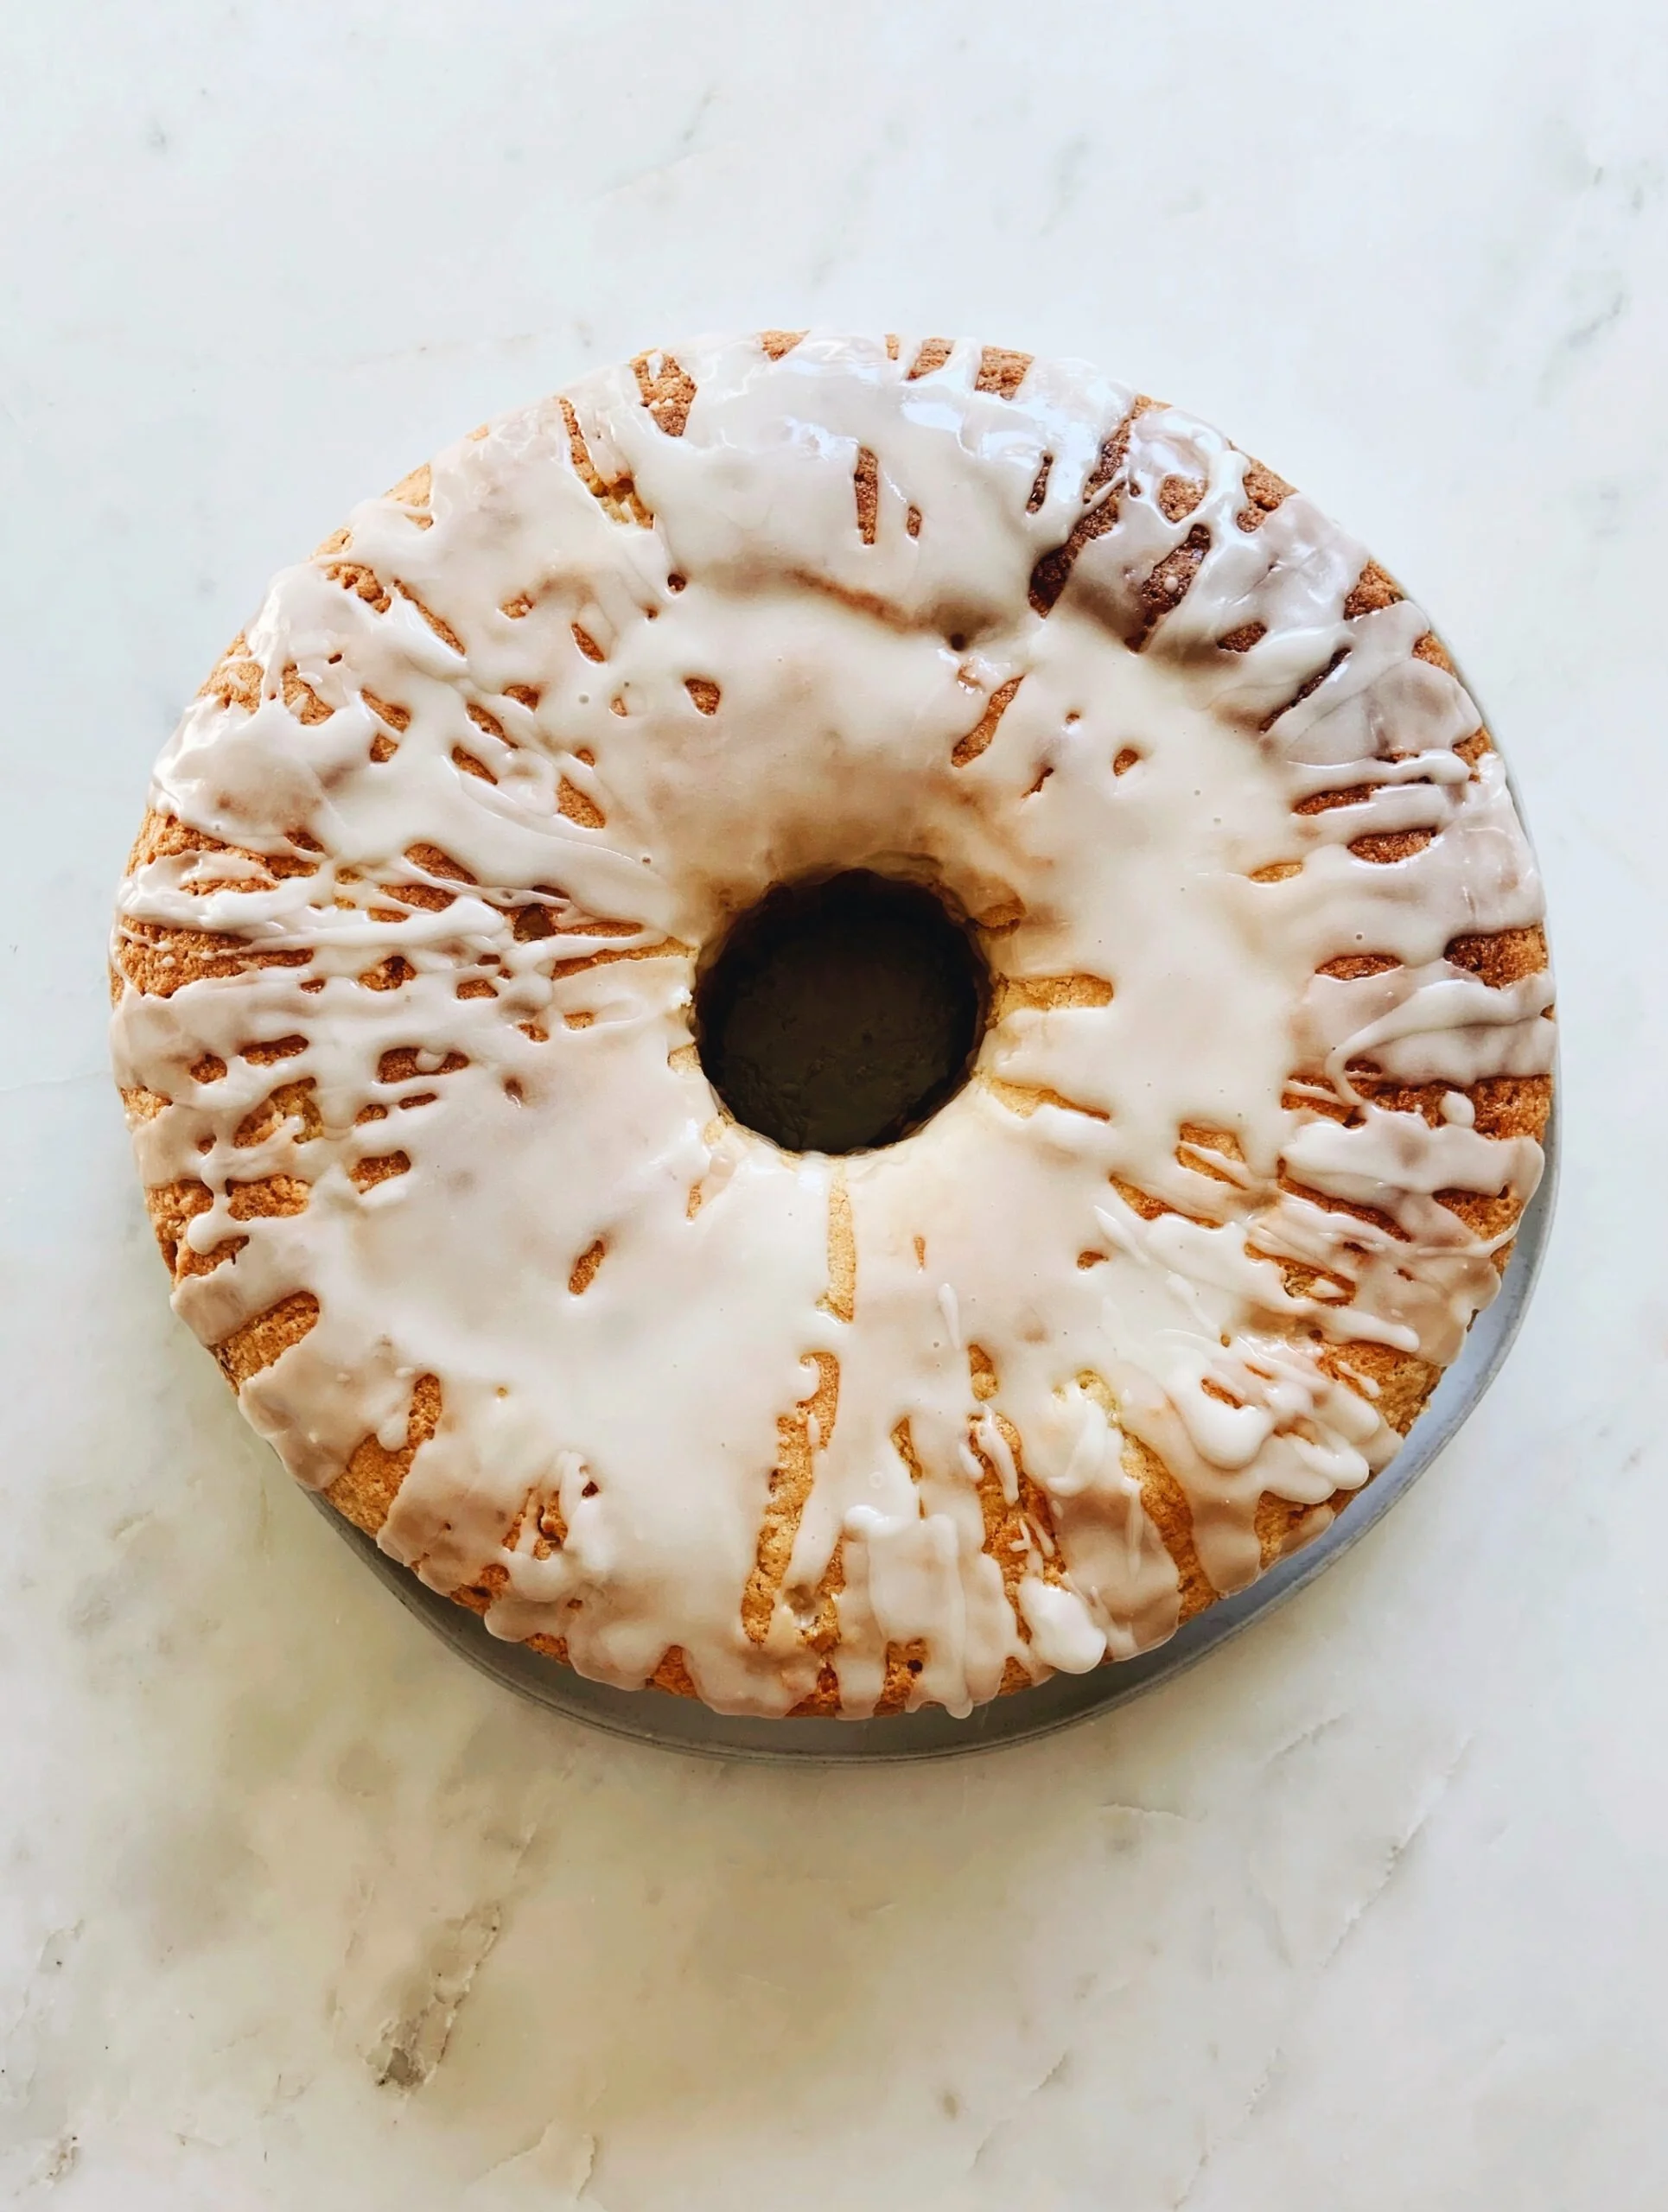
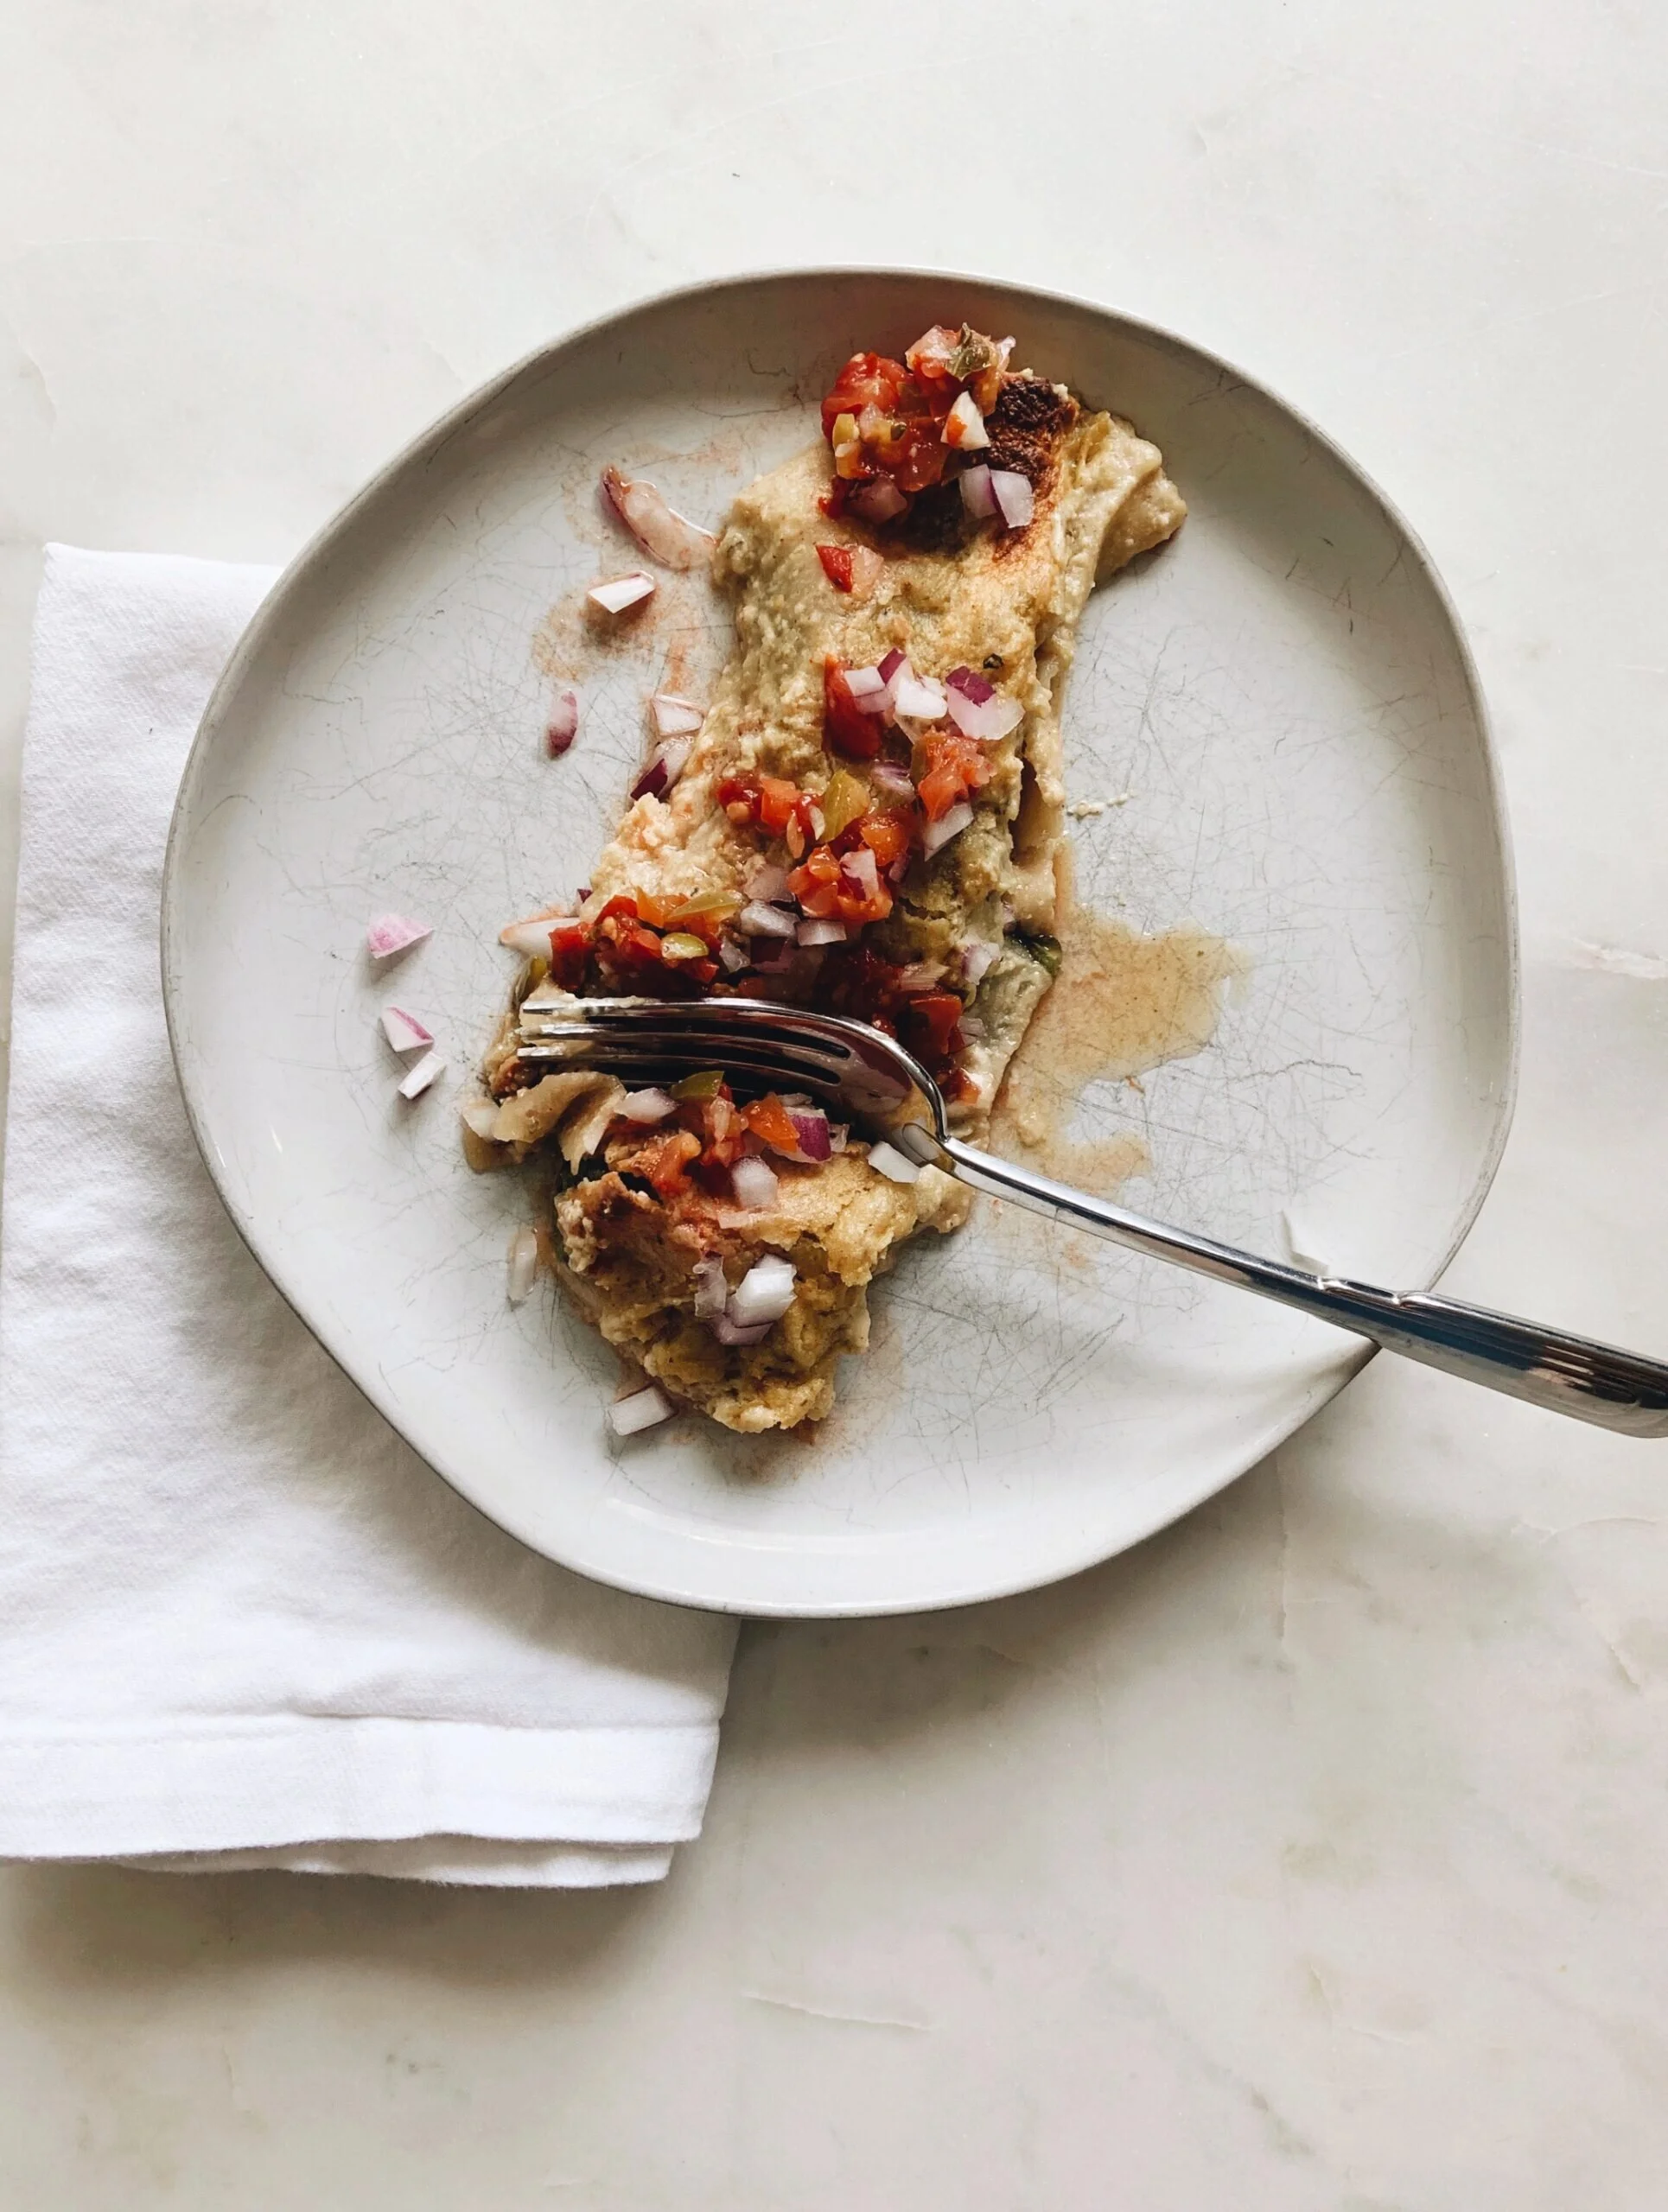
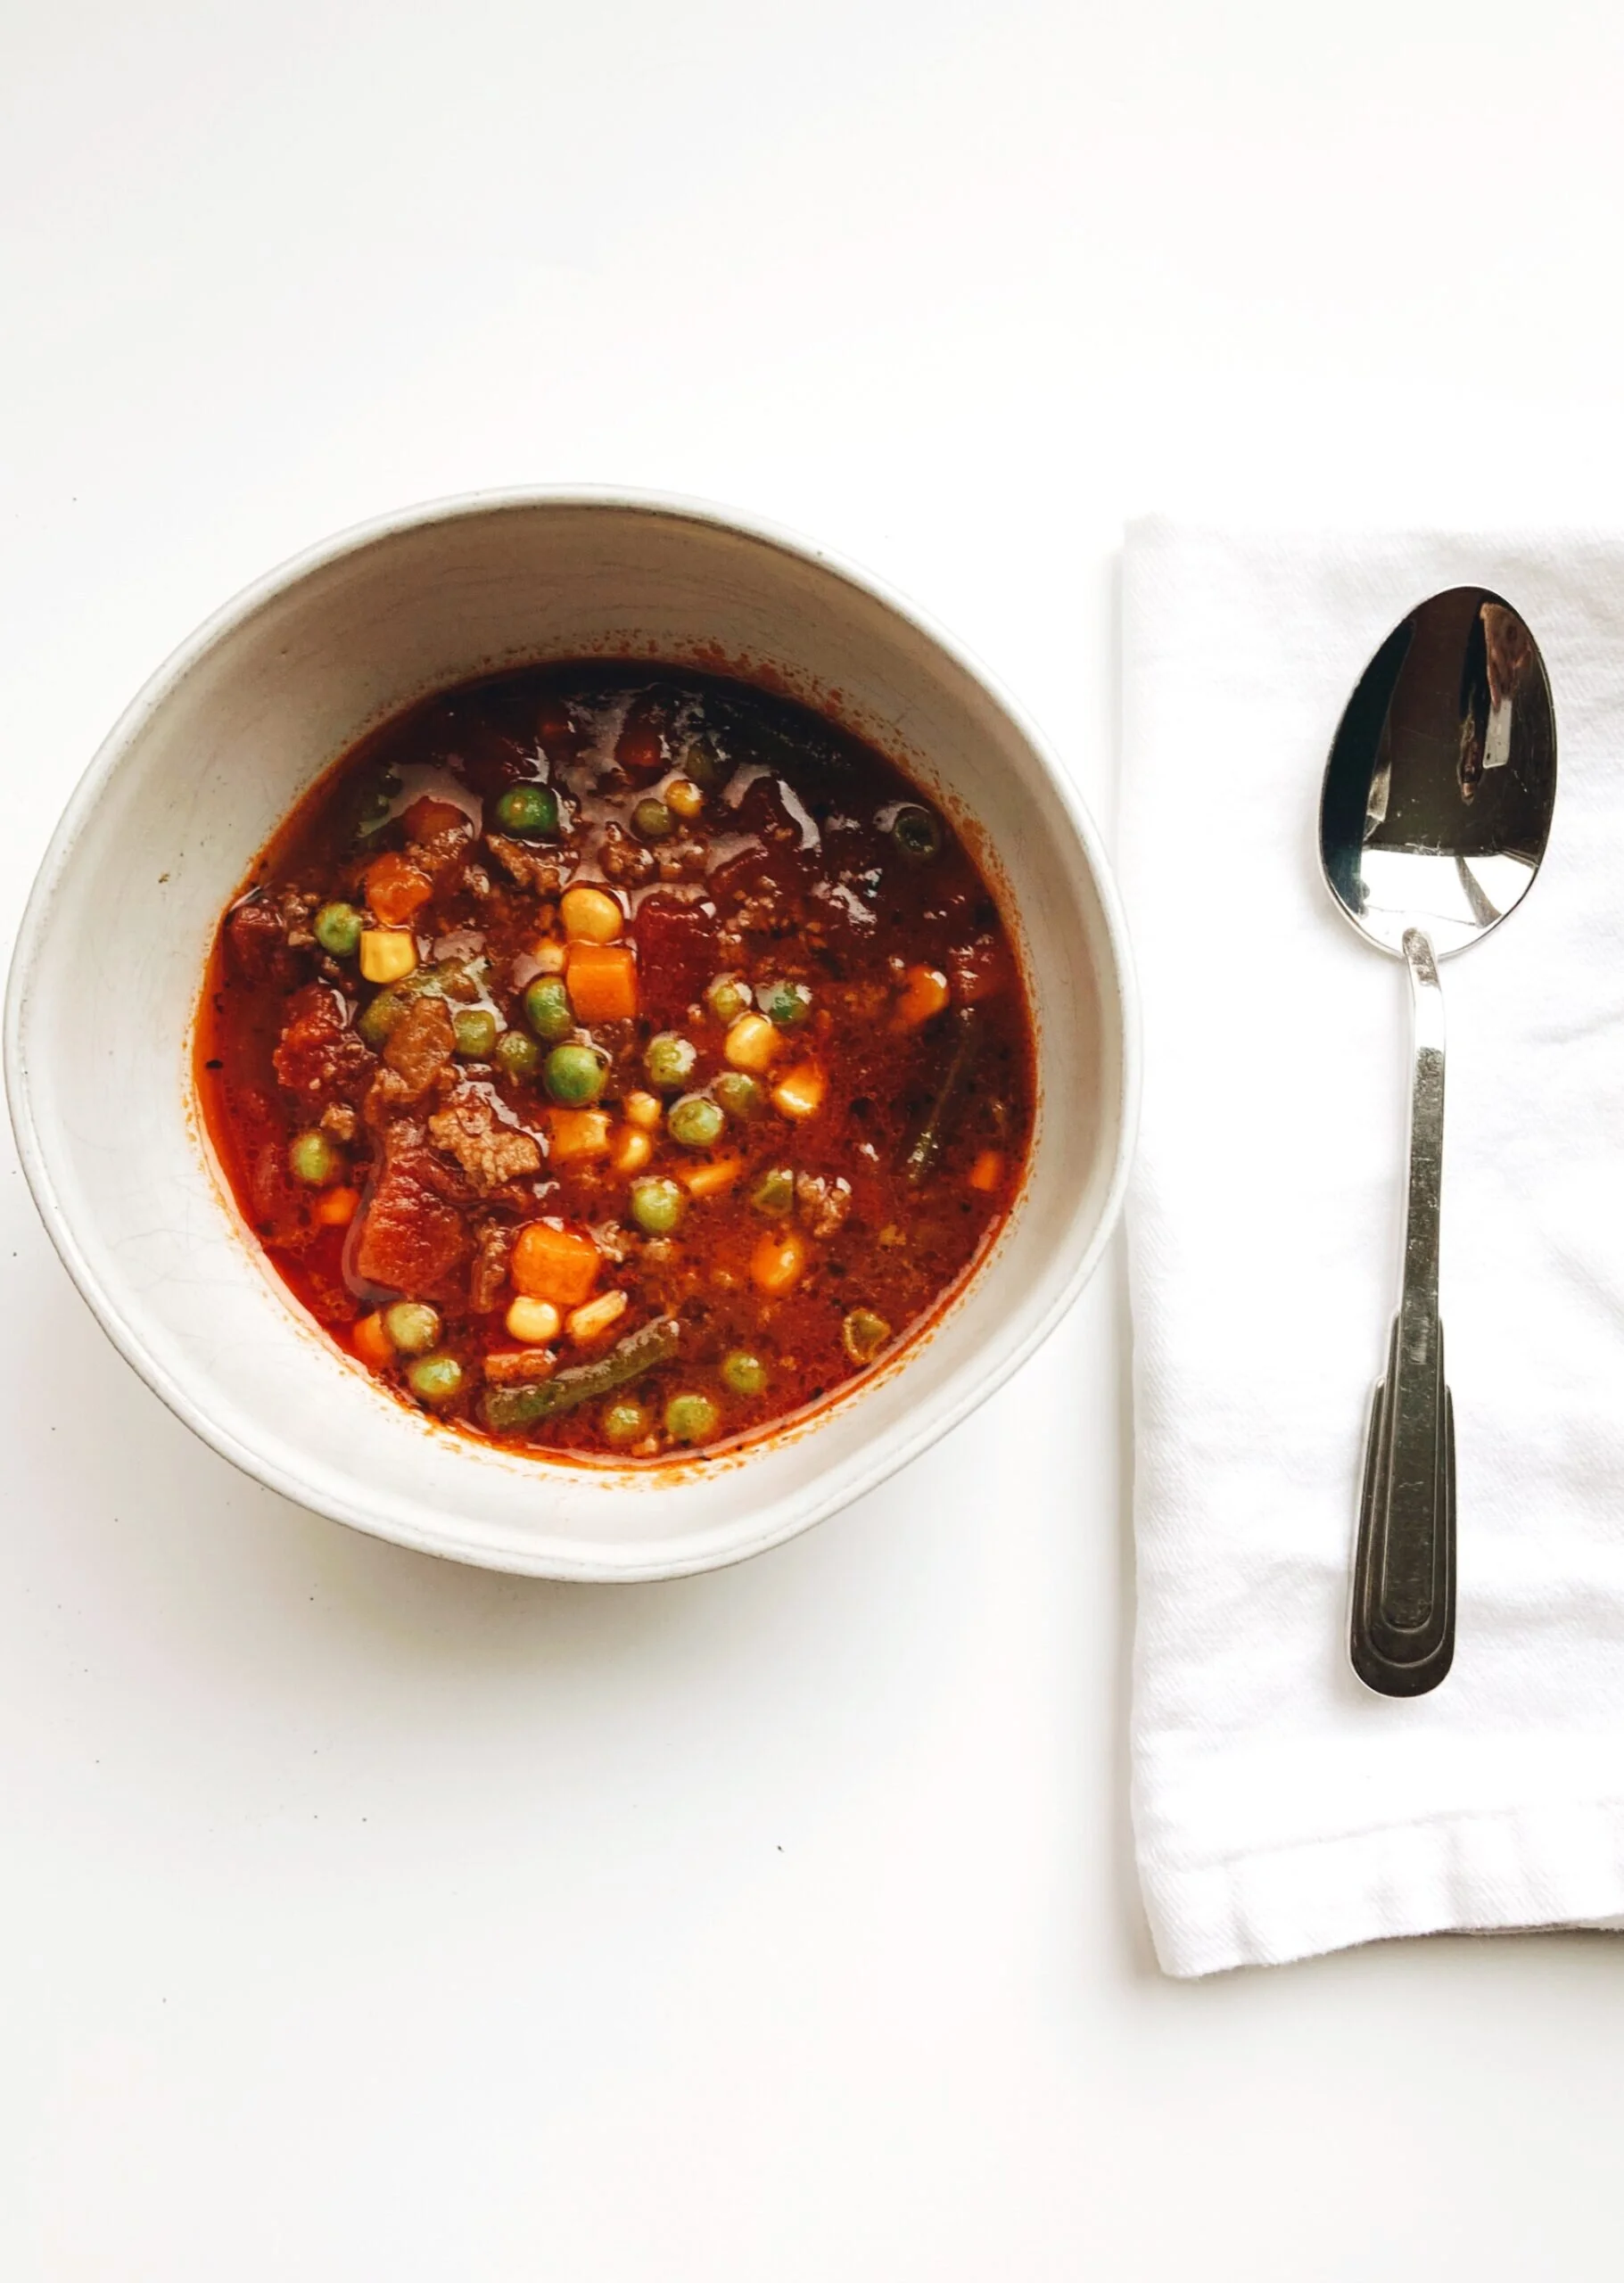
Thursday, June 30 2022 - Welcome
  • ABOUT
  • PRESS
  • CONTACT
Black House Blue Sky
A creative lifestyle blog by Michel McClamrock Van Devender.
  • THE GOODS
    • THE GOODS

      YOU CAN NOW SHOP OUR CUSTOM DESIGNED +…

  • OUR HOUSES
    • OUR HOUSES

      THE HOME EDIT: PAIRING DOWN + LIVING WITH…

      OUR HOUSES

      HOME TOUR: OUR MODERN BLACK HOUSE NEW BUILD…

      OUR HOUSES

      NOTE CHANDELIER: UNIQUE LIGHTING FOR THE HOME

      OUR HOUSES

      OUR MODERN BUILD: STYLE

      OUR HOUSES

      NEW HOUSE UPDATE: WE HAVE DRYWALL

  • INTERIOR + EXTERIOR
    • INTERIOR + EXTERIOR

      FRIDAY MUSINGS: I WANT TO LIVE IN A…

      INTERIOR + EXTERIOR

      SUMMER IS COMING: THE BEST IN SWIMMING POOL…

      INTERIOR + EXTERIOR

      FRIDAY MUSINGS: NEW HOUSE 2.0

      INTERIOR + EXTERIOR

      BLACK KITCHEN CABINETS: DESIGN TREND OR NEW CLASSIC?

      INTERIOR + EXTERIOR

      KEEPING IT INTERESTING: MAKING A STATEMENT WITH YOUR…

  • STYLE + FASHION
    • STYLE + FASHION

      ALL THAT SPARKLES: HOW TO ADD PRETTY SEQUINS…

      STYLE + FASHION

      I HAVE A BIG STYLE CRUSH: ERIN WASSON…

      STYLE + FASHION

      21 FAUX FUR COATS THAT WILL ALWAYS BE…

      STYLE + FASHION

      I HAVE A BIG STYLE CRUSH: JENNA LYONS…

      STYLE + FASHION

      EASY, EFFORTLESS STYLE: ENTER THE MAXI DRESS

  • FOOD + DRINK
    • FOOD + DRINK

      SIMPLE ONE POT HOMEMADE TOMATO SOUP

      FOOD + DRINK

      NOT GONNA LIE, IT’S THE BEST CARROT CAKE…

      FOOD + DRINK

      THE BEST TURKEY BURGER RECIPE FROM BLUE APRON

      FOOD + DRINK

      OUR FAVORITE HALLOWEEN DINNER: HOW TO MAKE MUMMY…

      FOOD + DRINK

      A SUPER EASY PEACH CRUMBLE WITH GRANOLA TOPPING…

  • TRAVEL
    • TRAVEL

      A STYLISH STAY IN MONTAUK, NEW YORK

      TRAVEL

      A STYLISH STAY IN NEW YORK CITY: ACE…

      TRAVEL

      STAY IN STYLE: NEW ORLEANS

      TRAVEL

      TRAVEL FINDS: A STUNNING NEW YORK CITY MODERN…

      TRAVEL

      GET OUT OF TOWN: HIGH POINT NC FURNITURE…

  • LIFE + ETC.
    • LIFE + ETC.

      HOW TO MAKE EASY NATURAL EASTER EGG DYES

      LIFE + ETC.

      OUT OF INSTAGRAM JAIL: RELEASE DATE 3-24-2022

      LIFE + ETC.

      INSTAGRAM JAIL: WHY I’M OKAY WITH MY DISABLED…

      LIFE + ETC.

      SKIN CANCER: WHEN YOU LEARN YOU HAVE MELANOMA

      LIFE + ETC.

      DIY: HOW TO PAINT LEATHER + VINYL WITH…

food

FOOD + DRINK

OUR FAVORITE HALLOWEEN DINNER: HOW TO MAKE MUMMY DOGS

by Michel Van Devender October 30, 2021

h A p P y H a L l O w E e N!!!!

It’s that time of year again, MUMMY TIME! It’s a fun, festive, favorite Halloween tradition in our house, and one we’ve been doing for over eight-plus years. It’s our absolute favorite Halloween dinner. Even as our boys have gotten older, they still request these EVERY Halloween. Makes me a happy mom! And I mean, who wouldn’t love a good dog covered in crescent roll dough with a side of ketchup and mustard? 

We try to use a higher quality hot dog and crescent roll when possible. We like Applegate Hotdogs and Annie’s Crescent Rolls. However, they are equally as yummy using most any hot dog and crescent roll. I like to serve with a fruit or vegetable along with some good ole classic tater tots.

Here’s a step-by-step, how-to guide, with videos, on how to make these Pinterest-inspired mummy dogs. I’m not going to lie, wrapping the dough bandages around 12-14 of the dogs takes a minute, but it’s well worth the effort. After all, we only make these once a year. And, the smiles and joy these little guys bring is the best kind of reward for this mom and all that round and round and round wrapping!

We hope you and your family get a chance to try this recipe and enjoy this little dogs as much as we do! Happy Mummy Halloween… stay safe!

🖤💙,

0 FacebookPinterestEmail
FOOD + DRINK

HOW TO MAKE A SIMPLE APPLE PIE

by Michel Van Devender September 1, 2020

Goodbye August and hello September!!! To say we’re excited about fall over here would be an enormous understatement! After all, we are most definitely autumn people. Don’t get me wrong, we enjoy the other seasons too and so many of the beautiful, unique benefits that accompany each one, but there’s something extra special about fall. And, it has nothing to do with pumpkin spice EVERYTHING either, although we do like pumpkins. We get all the feels when the cooler temps arrive, the cozy sweaters come out, the trees begin their spectacular color show and the earthy smell of burning wood is in the air. Ahhhhh… it’s just the best!!!

One of our favorite fall, family outings is day-road-tripping to the North Carolina foothills or mountains and picking apples at an organic orchard. It’s a convenient, scenic two or so hour drive from where we live. Bonus gift is viewing God’s spectacular showcase of the cycle of life manifested through the changing leaves. This begins at the higher elevations first and the colors always seem far more vivid and brilliant up there.

Once we return home with our bags of apples, we soon realize it will be almost impossible to eat our harvest apple-by-apple before they spoil. We’re then tasked with searching for ways to use and preserve our sweet, crisp, delicious fruit. Although apple butter is always on my list, my kids usually have a different idea about how the apples should be used. This typically involves desserts and baked goods, like this American classic – apple pie! 

I’m sharing a super easy recipe I made with my youngest son who is nine. For this pie, we were pushed for time and wanted to keep it simple so we purchased a Pillsbury deep dish pie crust two-pack. I love making our own pie crust, but sometimes the store purchased ones are fine too. We used one curst for the bottom and the second one for the top. Once the crusts are at room temperature, it’s super easy to remove one from the aluminum pan, roll out and cut into strips. My son actually had fun doing this part so what you see in the photo is his version of a lattice crust without the criss-cross, but just the cross :). We served the pie hot and topped our slices with vanilla ice cream. So simple and so gooooodddd!

🖤💙,

Print
Serves: 6-8 Prep Time: 45 minutes Cooking Time: 35 minutes 35 minutes
Nutrition facts: 200 calories 20 grams fat

Ingredients

  • 8-10 medium apples (about 8 cups or 4 pounds), peeled, cored and sliced
  • 1/4 cup all-purpose flour
  • 2/3 cup sugar
  • 2 teaspoons cinnamon
  • 1/2 teaspoon nutmeg
  • 1 tablespoon lemon juice, freshly squeezed
  • 2 tablespoons butter
  • 1 tablespoon coarse sugar

Instructions

1. Place prepared apples in large saucepan. Sprinkle flour, sugar, cinnamon, nutmeg and lemon juice over apples. Cook over medium low heat until the apples begin to soften, about 10 minutes. Stir a couple of times while cooking.

2. Pour cooked apple mixture into a 9″ deep dish pie crust. Spread evenly with spoon. 

3. Dot top of apples with the butter cut into small pieces.

4. Top with either second, full pie crust or create lattice top with rolled pastry dough.  Please see above note for how we used store bought crusts for our version of a lattice top.

5. If using a full pie crust, cut slits in top with a knife.

6. Sprinkle top with course sugar.

7. Bake at 425 degrees for 35 minutes or until crust is golden brown. 

8. Allow to cool slightly before slicing.

9. Serve with vanilla ice cream and enjoy!


0 FacebookPinterestEmail
FOOD + DRINK

HOW TO MAKE THE TASTIEST GAZPACHO

by Michel Van Devender July 21, 2020

Nothing says summer quite like fresh produce, especially tomatoes. From heirloom to cherry to Roma, they are all welcome in our kitchen and on our meal plates. I’ve had a long-term love affair with gazpacho for most of my adult life. During the summer months, there’s something so refreshing and satisfying about a cold soup packed with many of the veggies from our little beloved urban backyard garden, combined with other ingredients most people have stocked in their pantries. It’s basic chopping and super easy to prepare. Since we’re packing to move and working on the construction of our new house, quick, simple and healthy recipes are my jam. And, the fact you don’t even have to turn on the stove to cook this is a big bonus in my book, especially when you’re experiencing a July heat wave in the south. So, when you have a surplus of those tomatoes, cucumbers and peppers, you’ll have a perfect way to use them. Well, and then there’s homemade salsa 🙂 … I’ll be sharing one of my favorite salsa recipes later this summer. Stay tuned, safe + well!

🖤💙,

Summer Gazpacho

Print
Serves: 10-12 Prep Time: 30 min.
Nutrition facts: 200 calories 20 grams fat

Ingredients

  • 3 pounds fresh tomatoes, diced (some people peel and remove seeds, I do not)
  • 32-48 ounces tomato or veggie juice (I used Trader Joe’s Low Sodium Garden Patch)
  • 2-3 garlic cloves, minced
  • 3/4 cup red onion, chopped
  • 1 yellow pepper, chopped
  • 1 red onion, chopped
  • 2 -3 cucumbers, chopped
  • 4 tablespoons red wine or balsamic vinegar
  • 1/4 cup extra virgin olive oil
  • 6 dashes your favorite hot sauce
  • 3 teaspoons kosher salt
  • pepper to taste
  • fresh basil for garnish

Instructions

1. Combine all veggies in large, deep bowl.

2. Scoop roughly 1/2 –  2/3 of bowl into food processor and pulse until desired consistency. If you want chunkier gazpacho you’ll do less. If you want less chunky version, you’ll do more. 

3. Return the processed veggies to bowl. Add remainder of ingredients and stir. You may need to add more vinegar or salt and pepper based on taste.

4. Refrigerate for 4 hours or overnight for most flavorful.

5. Top with fresh basil and serve with crusty bread (or sans bread if you’re lower carb).


0 FacebookPinterestEmail
FOOD + DRINK

THE BEST LEMON POUND CAKE, LIKE EVER

by Michel Van Devender May 8, 2020

This is the MOST requested cake in our house, and hands down, the best lemon pound cake recipe I’ve found. Two of my sons have birthdays a day apart in April, and they both request this for their birthdays, every year! Yes, I end up making two, but try to spread them out over the course of a couple of weeks so we can extend the cake joy. For me, the best desserts are chocolate, but I love this cake so much. The recipe is from Julia over at Dozen Flours . I think the reason it is sooo good is because there’s no lemon extract, just straight up lemons. For this reason, the cake requires several extra steps including zesting and separating the lemon segments. It is a bit tedious and time consuming, but in my opinion, well worth it. Hope you enjoy!

🖤💙,


The Best Lemon Pound Cake

Print
Nutrition facts: 200 calories 20 grams fat

Ingredients

  • 4 – 5 small lemons, organic if possible (smaller lemons typically have more juice + flavor)
  • 3 cups cake flour
  • 1/2 teaspoon baking soda
  • 1/2 teaspoon salt
  • 1 cup (2 sticks) unsalted butter, at room temperature
  • 3 cups superfine sugar (also called caster or baker’s sugar)
  • 6 eggs, warmed for 10 minutes in hot tap water
  • 1 cup full-fat sour cream, at room temperature
  • Glaze:
  • 1 – 2 lemons
  • 1 – 1 1/2 cups powdered sugar

Instructions

  1. Preheat oven to 325 degrees. Grease and flour a tube cake pan, including center column. Set aside.
  2.  Thoroughly clean and dry lemons. Zest lemons in a bowl (large enough to add sugar later), avoiding the pith (the white part below yellow) as it will add bitterness to the cake. I usually do 5 lemons, although the original recipe calls for 4. Set aside.
  3.  Using lemons you zested, cut off top and bottom of each lemon. Over a bowl, separate lemon segments from membranes, capturing any juice in bowl. This can be done with a sharp knife, or I sometimes find it easier to use my hands. If you can recruit your significant other to do this for you, bonus! The goal is to collect as many lemon segment clusters as possible. There will be some juice, but not a lot. You can look at the original recipe, linked above,  for more details on this process as it is outlined with step-by-step instructions and also provides links to tutorials. 
  4. Add sugar to bowl with lemon zest. Combine and work together with your fingers or a fork until the sugar is moist and aromatic. Set aside.
  5. Sift flour, baking soda and salt into a medium bowl and set aside.
  6. Using a stand or hand mixer, beat butter for 2 minutes at medium speed. Add half the sugar and beat for an additional 2 minutes. Add the other half of the sugar and beat for 4 minutes, scraping down sides of bowl a couple of times.
  7. Remove eggs from warm water. Add one at a time to the butter and sugar mixture, beating until just combined.
  8. On the lowest setting, beat in the dry ingredients followed by the sour cream.
  9. Gently fold in the lemon segments and juice.
  10. Transfer batter to prepared pan. Bake cake for approximately 90 minutes, checking every 10-15 minutes after 60 minutes. When done, a cake tester inserted into the center should come out clean.
  11. Remove cake from oven and cool on a wire rack for 15-20 minutes. 
  12. After cake has cooled slightly, carefully remove from pan and place on a plate.
  13. While cake continues to cool, juice 2 lemons. Add powered sugar 1/2 cup at a time, mixing with a whisk, until desired consistency. If glaze is too runny, add more powdered sugar. If too thick, add more lemon juice. 
  14. Drizzle glaze over top and sides of cake.
  15. Serve! We sometimes eat warm because my boys cannot wait until cake has cooled, although I prefer the taste of the cooled cake. 

0 FacebookPinterestEmail
FOOD + DRINK

ENCHILADA WITH CASHEW CHEESE SAUCE

by Michel Van Devender February 13, 2020

In our house, Mexican cuisine is by far the most requested and beloved. We jokingly say it is one of our major food groups! Over the past year, between several of our family members, we’ve identified multiple food allergies so try to avoid dairy and gluten as much as possible. Our typical go-to Mexican dishes have been more difficult to prepare and enjoy as many of our favorites are covered in, you guessed it, cheese. On top of the food allergies, my eight year old son is the pickiest eater, EVER! Preparing nutritious, allergy-friendly meals that also happily satisfy everyone’s palette can be a real chore and challenge. How many of you can relate? I’m forever experimenting in the kitchen, combining and modifying recipes and ingredients, in hopes of finding yummy entrees that can be made sans gluten and dairy, especially Mexican ones. These enchiladas are hands down my cute, little picky eater’s favorite dinner. And, this version is dairy free and can easily be made gluten free too. It may be hard to imagine enchiladas without the cheese, but I promise you will not miss the dairy with the delicious, creamy cashew queso. This is a recipe that can be made to accommodate your family and your specific diet needs and lifestyle preferences. For the version pictured, I used BBQ pork tenderloin we had left over from dinner the night before. You could also use chicken or steak OR skip the meat altogether and pack the enchiladas with beans and vegetables (like onions, peppers and zucchini). Even when I use meat, I usually add fresh spinach, black beans or corn depending on what we have in our refrigerator, freezer or pantry. You really cannot go wrong with any combination of protein and/or vegetables. Hope you enjoy!

🖤💙,

Enchiladas Verde With Cashew Queso

Print
Serves: 6-8 Prep Time: 30 min. Cooking Time: 25 min. 25 min.
Nutrition facts: 200 calories 20 grams fat

Ingredients

  • ENCHILADAS:
  • 3 cups shredded pork, chicken or beef
  • 3/4 – 1 cup black beans, corn, spinach or other veggie (anything you might want to add), optional
  • 1 teaspoon smoked paprika
  • 1/2 teaspoon cumin
  • 1/2 teaspoon dried oregano
  • 1/2 teaspoon black pepper
  • 1/2 cups salsa verde
  • 12 tortillas (I use gluten free Siete)
  • cashew queso (recipe below)
  • CASHEW QUESO:
  • 1 1/2 cups raw cashews
  • 3 tablespoons nutritional yeast
  • 1 teaspoon salt
  • 1/4 teaspoon smoked paprika
  • 1/4 teaspoon ground cumin
  • 1/4 teaspoon garlic powder
  • 1 3/4 cups water
  • 1/2 teaspoon dry mustard
  • 1 cup salsa verde
  • TOPPINGS (OPTIONAL):
  • cilantro, chopped
  • red onion, chopped
  • avocado, chopped
  • fresh tomato salsa

Instructions

1. Preheat oven to 375 degrees and spray a 9 X 13 inch baking dish with non-stick cooking spray.

2. In a large bowl, place your choice of meat and any other ingredients you’d like in the enchiladas (veggies, black beans, corn, etc.). Add the paprika, cumin, dried oregano, black pepper and 1/2 cup salsa verde. Stir to combine.

3. If you’re using gluten free tortillas, place them on a plate and microwave for 30 seconds to warm. This will soften them so they’re easier to roll and less likely to break. If you’re using flour tortillas, you can skip this step.

4. Working one at a time, add a small amount of the enchilada filling to each tortilla. Roll and place seam side down in the baking dish. Continue until all of the tortillas are filled and the baking dish is full. Set aside.

5. Using  a clean coffee or nut grinder, working in three equal batches, grind the cashews into a soft powder. Avoid over grinding as it will eventually turn into cashew butter.

6. Into a medium sauce pan – cashew powder, nutritional yeast, salt, paprika, cumin and garlic powder. Whisk until the dry ingredients are blended. Slowly add the water and whisk until fully combined. Cook on medium heat, stirring constantly until bubbly and thickened. It only takes several minutes. 

7. Remove the cashew queso from the heat, add the dry mustard and allow to slightly cool. Add 1 cup of salsa verde and stir until well combined.

8. Pour the queso mixture over the prepared enchiladas and spread with a spatula to evenly coat.

9. Bake for 25-30 minutes, making sure the enchiladas are hot all the way through and bubbly. Depending on your oven, you may need to cover with foil for the first half of the baking time so the top doesn’t overcook.

10. Serve with your choice of toppings.

Notes

Making the queso is an extra step. If you’d prefer to save time and purchase your queso, the Siete brand makes a “Spicy Blanco” that can be found at Whole Foods.


0 FacebookPinterestEmail
FOOD + DRINK

THE BEST VEGETABLE SOUP WITH GRASS-FED BEEF

by Michel Van Devender November 21, 2019

An Easy, Quick, Healthy Meal

Vegetable soup is a personal favorite comfort food that stays on rotation during the fall and winter months in our house. Although, I’ve also been known to make it in the spring and summer… I know, it’s hot. The last time I made this soup, my 13-year-old son even said, “Oh yay mom, we’re having vegetable soup!” For me, that’s like my kid saying he loves me! Seriously, it’s the small things over here in this mom-of-three-boys house!

Since this is a super easy recipe that requires little time and effort, I usually make it when we have a busy weekday night, and I don’t have as much time to be in the kitchen. It’s literally working to get everything into the pot, and then just letting it simmer. The ingredients are simple, usually staples that we keep on hand in our freezer and pantry. 

The other thing I really love about this recipe is that it has a nice, flavorful tomato base, good for experimentation. You can make several different versions by simply switching up the meat and starch. It can also be made without the meat and/or starch to accommodate different dietary needs and lifestyles. Ideas for meat substitutions include ground turkey, ground chicken, shredded chicken, beef stew, Italian sausage and ground sausage. I sometimes use rice or other grain instead of potatoes. I also like it with quinoa, amaranth, or even cauliflower rice. You get the idea… I’m sure you can think of other combinations as well! Please be sure to share any great variations you discover. We typically serve with gluten-free toast or crackers. It’s also a great candidate for a grilled cheese if you eat dairy. Hope you enjoy! 

🖤💙,


Easy Vegetable Soup with Ground Beef

Print
Serves: 6-8 Prep Time: 30 min. Cooking Time: 1 hr., minimum 1 hr., minimum
Nutrition facts: 200 calories 20 grams fat

Ingredients

  • 1 pound ground beef
  • 1 24-ounce jar tomato basil spaghetti sauce
  • 1 14.5-ounce can diced tomatoes
  • 1 container beef bone broth
  • 1 16-ounce bag mixed vegetables
  • 2 small to medium onion, chopped
  • 2 cloves of garlic, finely chopped
  • 2 medium to large potatoes (can omit or use another starch)
  • 2 tablespoon dried parsley
  • 2 teaspoons dried oregano
  • 2 teaspoons dried basil
  • salt + pepper to taste

Instructions

1. Chop the onion and garlic. Place in a stock pot or dutch oven with the ground beef.

2. Brown the ground beef with the onion and garlic.

3. Once the ground beef, onion and garlic mixture are cooked, add the spices and diced tomatoes. Cook for 2 -3 minutes or until fragrant.

4. Add the spaghetti sauce and beef broth. Stir to combine. Cook for 10 minutes.

5. Add the mixed vegetables. Bring to a boil and then turn burner down to a simmer. Cook for a minimum of 1 hour.

6. Wash, peel and dice potatoes. Add to soup 15 – 20 minutes before serving. If you’d prefer less starch in the soup, you can cook the potatoes separately and add at the end. I never do this!

7.  Serve into bowls and let cool slightly before eating.

Notes

Variation 1 – omit meat or substitute with another type; Variation 2 – omit starch or substitute with another grain


0 FacebookPinterestEmail
Load More Posts

Hi, I’m Michel! Welcome… so glad you’re here :)!

Most Loved Posts

  • 1

    WHAT MY FALL DREAMS ARE MADE OF: A-FRAME CABINS

    November 9, 2021
  • 2

    THE BEST GRAPEFRUIT MARGARITA RECIPE

    May 5, 2021
  • 3

    THE DREAMIEST OUTDOOR LIVING SPACES YOU’LL LOVE

    May 11, 2021
  • 4

    DARK HOME EXTERIORS: 17 BLACK HOUSES YOU’LL LOVE

    May 28, 2021
  • 5

    HOME TOUR: 5TH STREET

    April 28, 2020

Pinterest Inspiration

@blackhousebluesky

Get On The List

Want to stay in the know with what's new around here? Simply subscribe!

  • Facebook
  • Instagram
  • Pinterest
  • Youtube

@2022 - Black House, Blue Sky. All Rights Reserved.


Back To Top
Black House Blue Sky
  • THE GOODS
    • THE GOODS

      YOU CAN NOW SHOP OUR CUSTOM DESIGNED +…

  • OUR HOUSES
    • OUR HOUSES

      THE HOME EDIT: PAIRING DOWN + LIVING WITH…

      OUR HOUSES

      HOME TOUR: OUR MODERN BLACK HOUSE NEW BUILD…

      OUR HOUSES

      NOTE CHANDELIER: UNIQUE LIGHTING FOR THE HOME

      OUR HOUSES

      OUR MODERN BUILD: STYLE

      OUR HOUSES

      NEW HOUSE UPDATE: WE HAVE DRYWALL

  • INTERIOR + EXTERIOR
    • INTERIOR + EXTERIOR

      FRIDAY MUSINGS: I WANT TO LIVE IN A…

      INTERIOR + EXTERIOR

      SUMMER IS COMING: THE BEST IN SWIMMING POOL…

      INTERIOR + EXTERIOR

      FRIDAY MUSINGS: NEW HOUSE 2.0

      INTERIOR + EXTERIOR

      BLACK KITCHEN CABINETS: DESIGN TREND OR NEW CLASSIC?

      INTERIOR + EXTERIOR

      KEEPING IT INTERESTING: MAKING A STATEMENT WITH YOUR…

  • STYLE + FASHION
    • STYLE + FASHION

      ALL THAT SPARKLES: HOW TO ADD PRETTY SEQUINS…

      STYLE + FASHION

      I HAVE A BIG STYLE CRUSH: ERIN WASSON…

      STYLE + FASHION

      21 FAUX FUR COATS THAT WILL ALWAYS BE…

      STYLE + FASHION

      I HAVE A BIG STYLE CRUSH: JENNA LYONS…

      STYLE + FASHION

      EASY, EFFORTLESS STYLE: ENTER THE MAXI DRESS

  • FOOD + DRINK
    • FOOD + DRINK

      SIMPLE ONE POT HOMEMADE TOMATO SOUP

      FOOD + DRINK

      NOT GONNA LIE, IT’S THE BEST CARROT CAKE…

      FOOD + DRINK

      THE BEST TURKEY BURGER RECIPE FROM BLUE APRON

      FOOD + DRINK

      OUR FAVORITE HALLOWEEN DINNER: HOW TO MAKE MUMMY…

      FOOD + DRINK

      A SUPER EASY PEACH CRUMBLE WITH GRANOLA TOPPING…

  • TRAVEL
    • TRAVEL

      A STYLISH STAY IN MONTAUK, NEW YORK

      TRAVEL

      A STYLISH STAY IN NEW YORK CITY: ACE…

      TRAVEL

      STAY IN STYLE: NEW ORLEANS

      TRAVEL

      TRAVEL FINDS: A STUNNING NEW YORK CITY MODERN…

      TRAVEL

      GET OUT OF TOWN: HIGH POINT NC FURNITURE…

  • LIFE + ETC.
    • LIFE + ETC.

      HOW TO MAKE EASY NATURAL EASTER EGG DYES

      LIFE + ETC.

      OUT OF INSTAGRAM JAIL: RELEASE DATE 3-24-2022

      LIFE + ETC.

      INSTAGRAM JAIL: WHY I’M OKAY WITH MY DISABLED…

      LIFE + ETC.

      SKIN CANCER: WHEN YOU LEARN YOU HAVE MELANOMA

      LIFE + ETC.

      DIY: HOW TO PAINT LEATHER + VINYL WITH…